
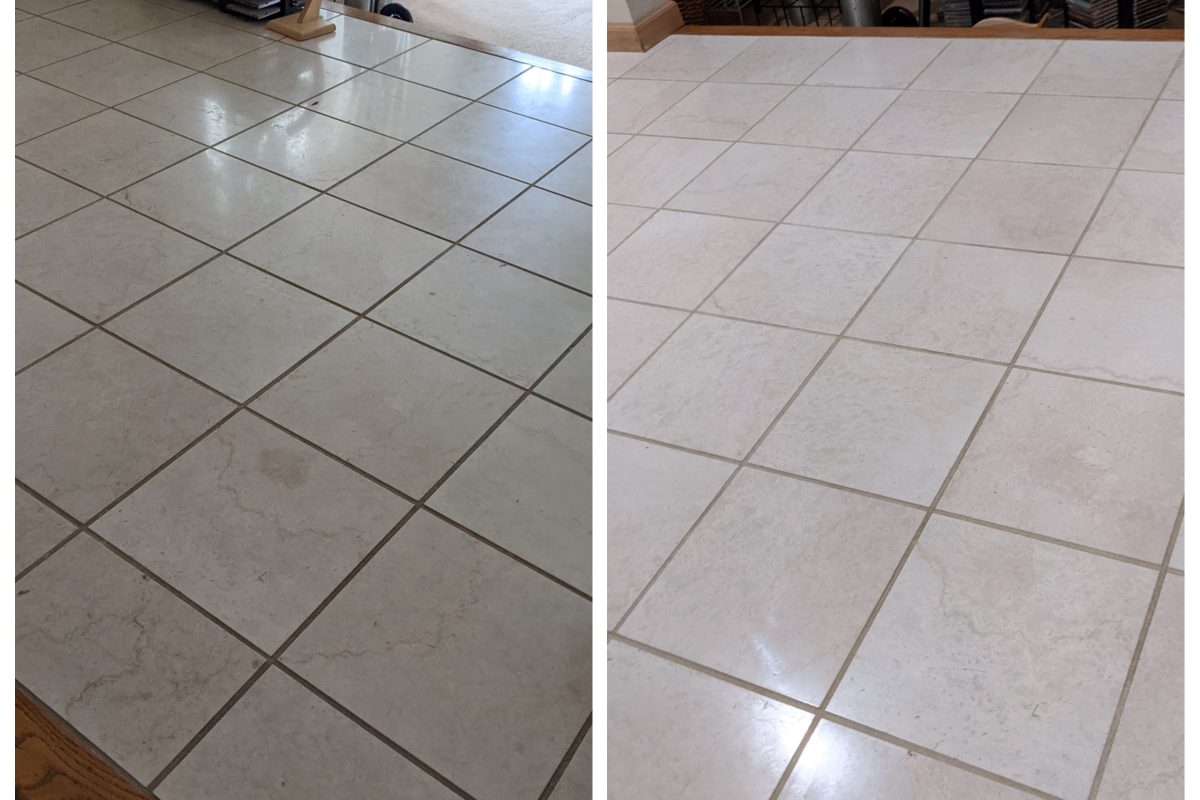
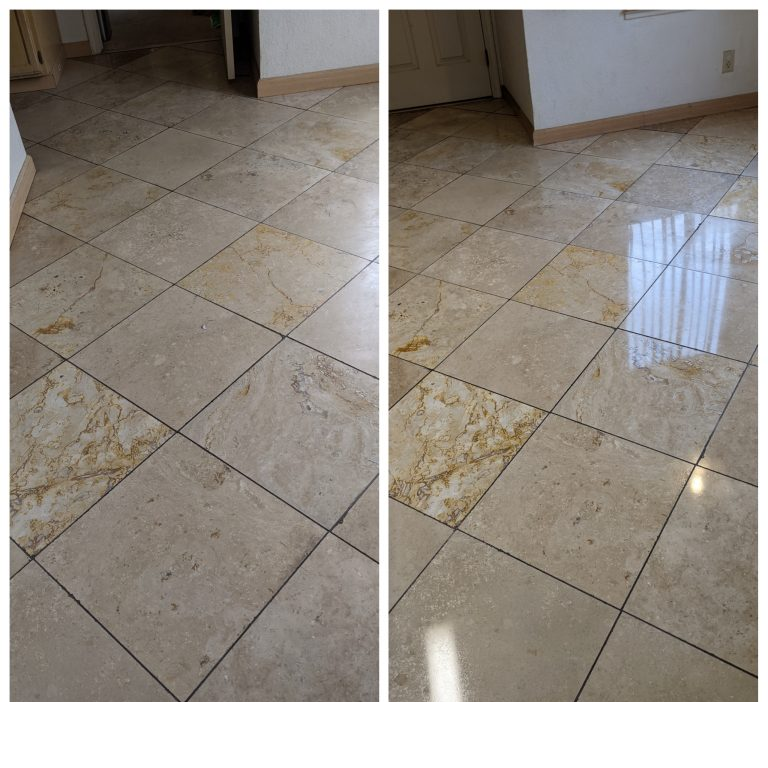
5 Stone Polishing Mistakes You’re Probably Making (and How to Fix Them)
Have you ever painstakingly polished a stone, only to be disappointed by a lackluster finish or unsightly scratches? You’re not alone! Stone polishing, while rewarding, can be a tricky process, especially when working with natural stone. Fortunately, many stone polishing mistakes can be easily avoided. Let’s see the five most frequent mistakes people make when polishing stones, and how to rectify them, ensuring your next project shines with brilliance. As experts in stone care, we at Accents in Cleaning are passionate about helping you achieve professional-quality results.
- Thorough preparation is important: Cleanliness and proper sanding set the stage for success.
- Choose your tools wisely: Match your polishing compound and technique to the stone type and desired finish.
- Gentle pressure and patience are your allies: Avoid damaging the stone by applying excessive force or over-polishing.
- Cleanliness is crucial throughout: Remove residue between each stage to prevent scratches and contamination.
- Don’t neglect the final touch: A final polish and protective sealant ensure lasting shine and luster.
Mistake 1: Skipping or Improperly Preparing the Stone
The first step to a beautifully polished stone is often overlooked: proper washing and preparation of the stonework. If there is any dust, dirt, or oils on the stone, then those must be cleaned before you start the polishing process. Failing to clean thoroughly is one of the most common stone polishing mistakes and can lead to unsatisfactory results. Most stones can be cleaned easily with warm soapy water and a soft brush. But if you are using natural stones such as sandstone or limestone (which are porous), do not soak them because this will lead to staining.
Secondly, determine the hardness of your natural stone. For this, the Mohs scale of mineral hardness could be an effective reference point. This means that while harder stones such as granite will take coarser grit sandpaper to begin with, softer stones such as amber may only require fine grit. Start with the correct grit sandpaper then go through the grades of sanding papers till you get a smooth surface that is perfect for polishing. Failure to do so creates deep scratches that are hard to eliminate, reducing your chances of getting the right shape and a polished surface on the stone.
Mistake 2: Using the Wrong Polishing Compound or Technique
A crucial point is that the type of the polishing compound and the way it is applied should be a decisive factor. Polishing compounds are available in the form of powder, paste, and liquid, and each of them has some characteristics which are ideal for a particular type of stone. To avoid stone polishing mistakes, it is essential to select the right compound for the material. Diamond compounds are more suited for hard stones such as gemstones, whereas cerium oxide is more suitable for softer materials like glass. Think about the desired sheen too; some polishing agents give a dull surface while others will give a shiny surface.
Using the right compound is as crucial as applying it properly. Some people like hand polishing because of the high level of control it offers, while others may use machine polishing or tools such as Dremel when carrying out large jobs, especially for lapidary where slicing and cutting is involved. To avoid common stone polishing mistakes, ensure you adhere strictly to the manufacturer’s instructions and safety measures. Always remember that picking the right tools and techniques is greatly influenced by your personal choice.
Mistake 3: Applying Too Much Pressure or Polishing for Too Long
In some cases, increasing the pressure or the amount of time spent on polishing will produce even better results. Sometimes, however, applying more pressure can cause the generation of heat that, if it reaches your stone, results in uneven polishing. This is particularly the case where the stone is relatively soft or has a complex carving or very thin edges. Failing to recognize this can lead to stone polishing mistakes that are difficult to correct later. It also requires some patience and a delicate approach. Review your work often and note that it is always more beneficial to shine several small sections than an entire large section.
Another negative effect is the possibility of over-polishing. It can take away excess material and leave the finished product looking flat and unexciting. If you are using a polishing machine, particularly a tumbler, then you should be very careful with this. However, for delicate stones or stained stones, other polishing methods include using a toothbrush with toothpaste or a denim cloth to polish at the final stages.
Here’s a Tip
If you have any doubts about the smoothness of the stone, you should pause and try to look at it under normal lighting conditions. This should enable you to determine the level of shine and if it requires further polishing or not.
Mistake 4: Not Cleaning Between Polishing Stages
This simple step is very important in getting the best and smoothest polish possible. Every single step in the polishing process needs to be followed by a proper cleaning of the stone’s surface in order to remove all the debris and particles. Stone polishing mistakes can occur if this cleaning is not done thoroughly, leading to scratches or contamination that erase all the efforts made. Wipe the stone with a soft cloth or rag, but ensure that you do not use the same cloth or brush to clean another stone.
In the case of most stones, only washing with soapy water is enough. However, if you are using porous stones, we recommend using a damp cloth to avoid staining the stones. Make sure that the stone is completely dry before proceeding with the next step in the polishing process.
Accents in Cleaning Tip
As a precaution, it is advisable to use different cloths or brushes in each stage of polishing so as not to introduce contaminants.
Mistake 5: Neglecting the Final Polish and Protection
This is your opportunity to create that perfect high gloss and shine surface. Be mindful of common stone polishing mistakes as they can affect the outcome significantly. Select a polishing powder or compound more appropriate for the final step and apply it carefully using the most effective method. This step may take a lot of time, especially while dealing with hard stones, but it will be worthwhile.
After you are done polishing then ensure that you protect the work that you have done by using sealant or wax. This will ensure that the surface of the stone remains shiny and does not develop further problems in the future. The choice of sealant or wax to be used will depend on the type of stone you’re using and where, whether it’s jewelry, accessories, or on display. If you are still in doubt, it is best to ask a stone expert or a jeweler for assistance.
With our expert tips, you can confidently polish your stones to perfection while avoiding common stone polishing mistakes. Remember, patience, attention to detail, and the right tools are key to success. And if you need further guidance or high-quality stone polishing service, Accents in Cleaning is always here to help.